Getting started
Create your first webpage
Learn how to use an editor to create a first webpage.
Learn HTML
We will not learn you how to code HTML or CSS. Use a tutorial like W3Schools for that: start with the "HTML introduction" and follow the pages until "HTML CSS".
Basic steps
These are the basic steps you should take. Each step is described in detail below.
- Install an editor
- Create a folder for your website
- Add a webpage (an index.html file)
- Add HTML code
- Preview the webpage
1. Install an editor
To write HTML code, you need a text editor. You may use an editor already present on your computer (eg. Notepad), but it is strongly recommended to use an editor which is suitable to manage a site and write code. We reccommend:
Install the editor you choose and continue with the steps below.
11-05-2023 In this tutorial Atom is used, but unfortunately, that has been discontinued. This page will be updated soon!
2. Create a folder for your website
In the Windows Explorer (or Finder) create a folder for your website, for example in your 'Documents' folder:
In Visual Studio Code: Choose File > Open Folder... and open the folder you just created.
You now are ready to add files to the website folder.
Important: add all files to the website folder
All files you would like to add to your site have to be in the website folder. So if you would like to add images, copy them to the website folder (it is recommended to create a subfolder for that, eg. with the name "img").
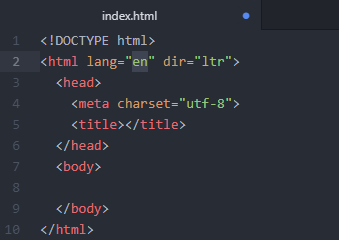
3. Add a webpage (an index.html file)
Add a file via File > New File, name it "index.html" and create it (press Create File):
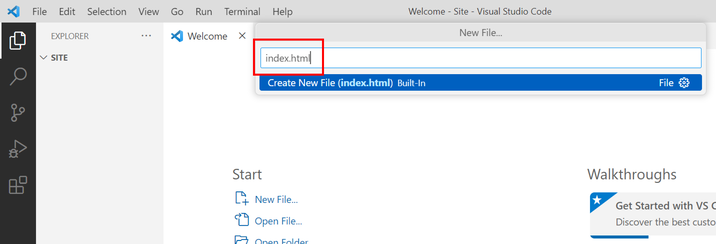
Your workspace should now look like:

You now are ready to add HTML code to the file index.html.
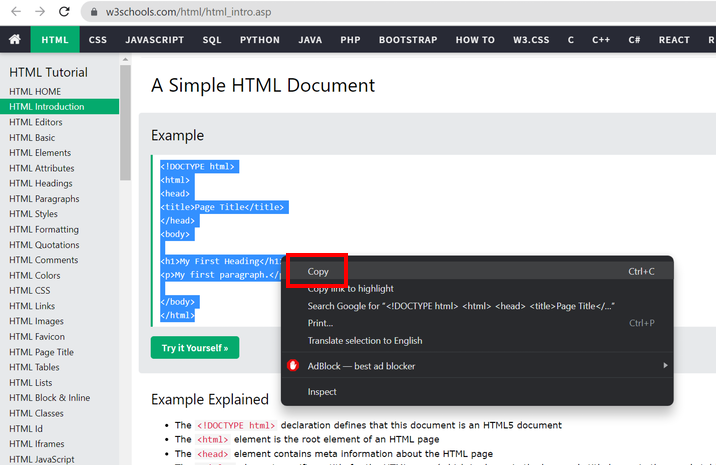
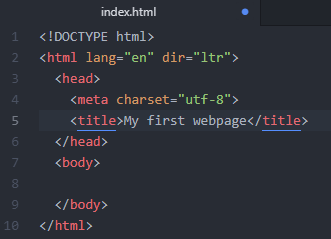
4. Add HTML code
Go to the HTML introduction of W3Schools, or to any other tutorial which shows a start of an HTML document. Now copy the HTML example code (select it and right-click it and choose Copy, or press CTRL+C):
Next, paste it in the index.html file in your editor (use Edit > Paste or CTRL+V):
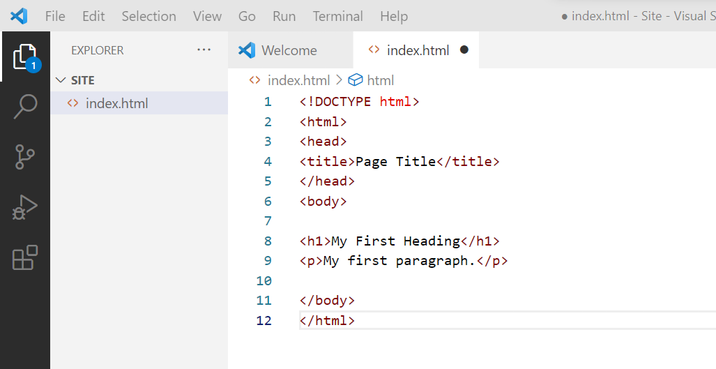
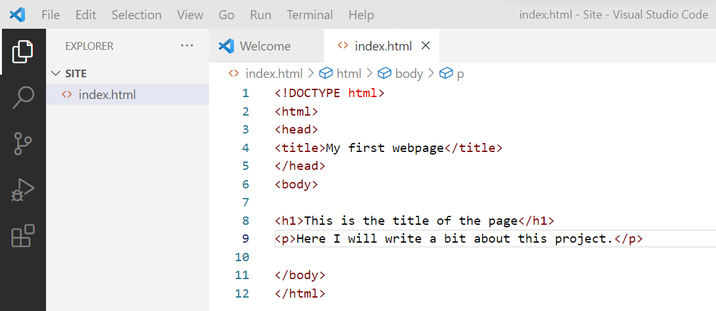
Make some changes to the code. Add a proper title, headers and paragraph-text (info shown below is just an example):
Is there a quicker way to do all this? Yes!
Type !, and then click the first snippet in the auto complete (or just press Enter).
It will generate the default HTML template.
Add an image
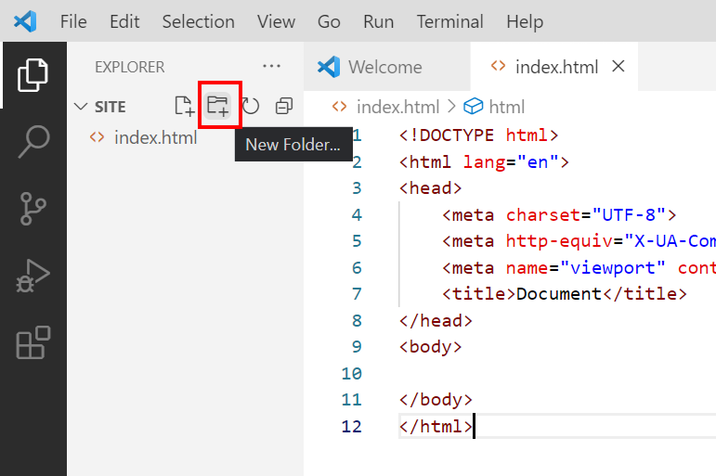
First, add a new folder 'img'. Use the New Folder icon next to the name of your folder ('Site' in this example):
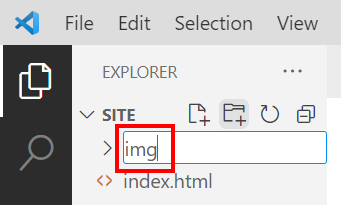
Add it's name "img" and press Enter:
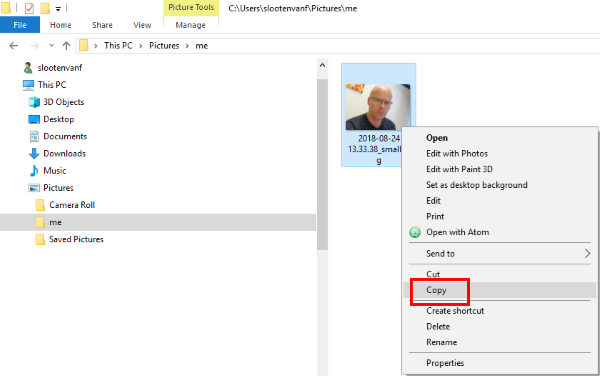
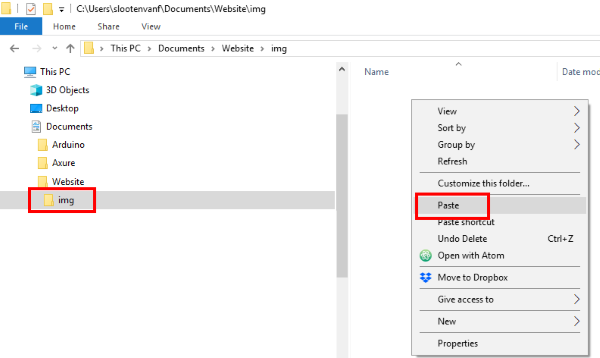
Copy an image to be used for the page to the folder "img" (use Windows Explorer/Finder):
Next, paste it in the subfolder 'img' of the website-folder:
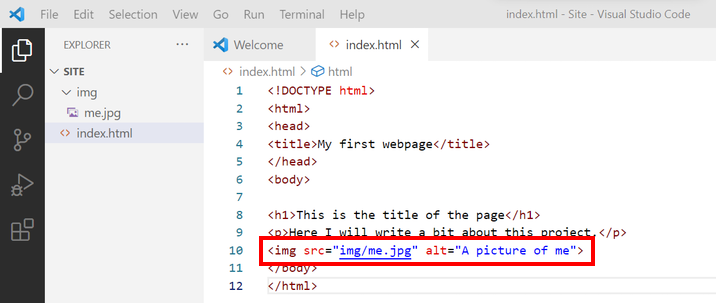
Now study the W3Schools tutorial chapter on images. Add code for an image element to embed the image in the html document:
5. Preview the webpage
Save the file. (File > Save or CTRL+S)
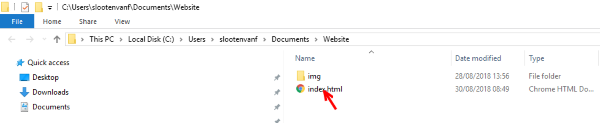
To check if the page looks good, you can preview it in your browser. In the Windows Explorer (or Finder), browse to the website folder and double-click on the index.html file:
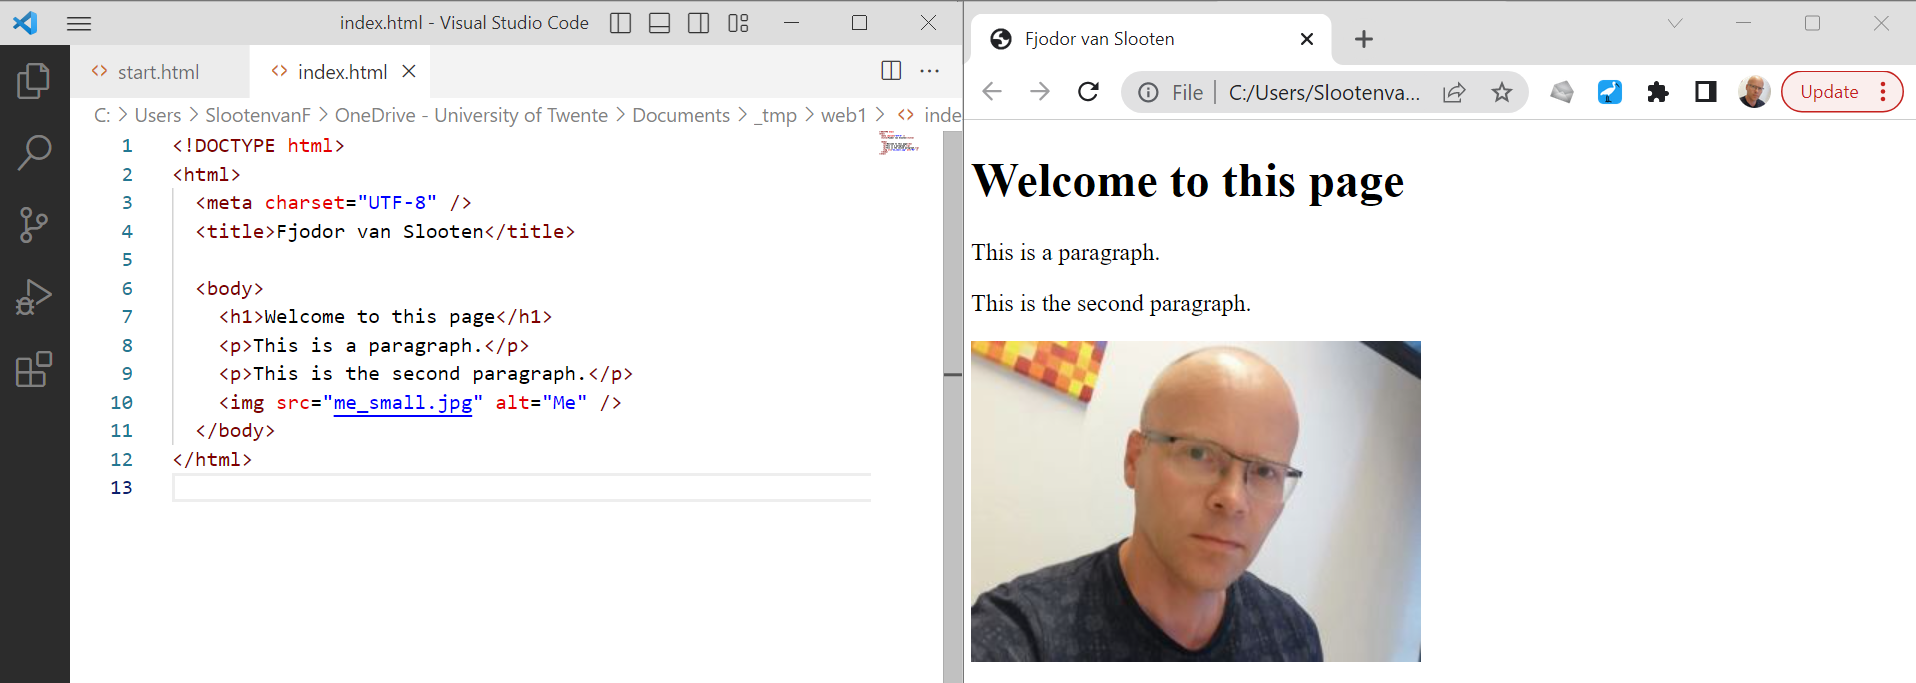
It might be a good idea to keep working with a preview opened, eg. with the browser next to the editor:
Tip:
To quickly browse to the website folder, you can open it directly from VS Code. Right-click the file tab and choose "Reveal in File Explorer".
Another way of getting an integrated preview in VS Code, is to install an extension for that. Open the Extensions view (Ctrl+Shift+X) and search on 'live preview' or 'html preview' to see a list of available HTML preview extensions.
You can now further customize the page, make it your own, try out things.
If you have not done so yet, then now is the time to learn a bit more about HTML from the W3schools tutorials. At
least read the first pages from Introduction until Styles and use/test what you learned by adding it to your HTML document. Maybe
even add some style (
go to the CSS tutorial of W3Schools to learn more).
You now are ready to upload the files to your site. This is explained in a separate page:
Next step: upload the page to your website
Important: your first page (homepage) should have the name index.html or index.php
For your site-address to work, your site should have an index-file: your first page (homepage) should have the name index.html (or index.php). Filenames are case-sensitive. Use only lowercase characters for index-files.
Problems with image? e.g. image does not show
The most common reason that images do not work is because of problems with filenames. On the website, file and folder names are case-sensitive. So you must be careful mixing uppercase and lowercase characters. Advise: always use lowercase characters! Other problems might occur with referencing the image in the html-code. Or you fogot to upload the image(s). Some examples are given below. Some articles on these issues:
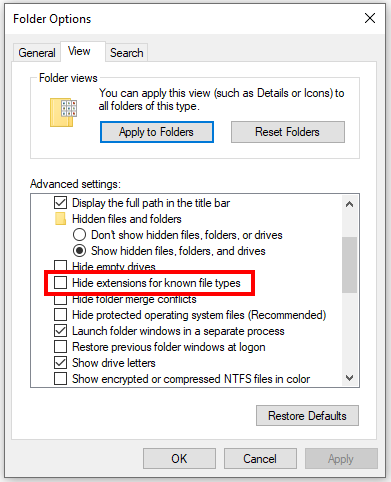
Windows tip: always show full filenames in Windows Explorer. Click the tab View, then via options, select "change folder and search options":

In tab View, uncheck the option "Hide extensions for known file types", and press Ok:
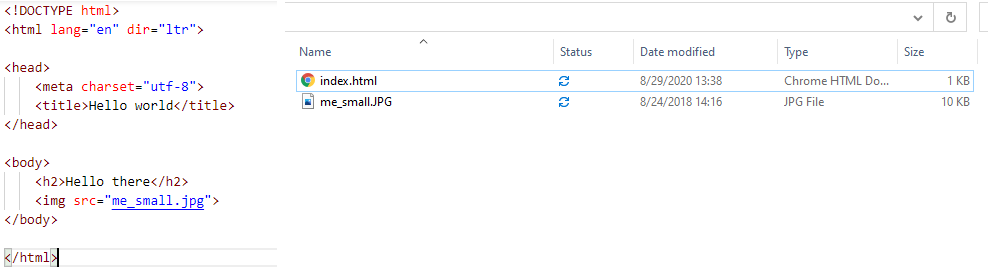
Example: Differences in case (uppercase/lowercase mixup)
Can you spot what is wrong here?:
In the case above, the extension of the file is in uppercase. And in the html code, it is in lowercase:
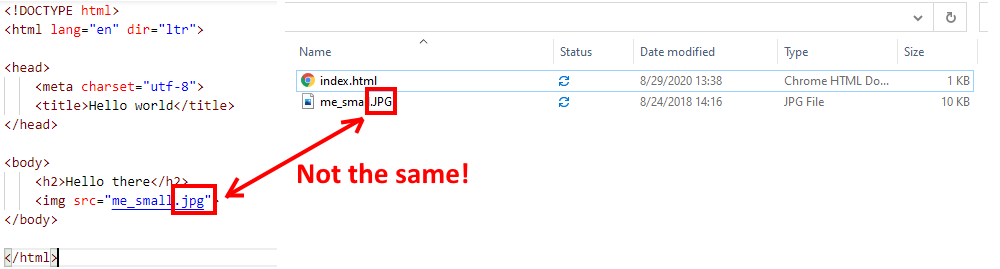
Best way to solve this, is to rename the file to me_small.jpg (with extension in lowercase). Problem which complicates this, is that in Windows, the webpage will work, when viewing it with a browser. But once you upload it, it will not work,
as most websites are hosted on Linux platforms, at which filenames are case-sensitive.
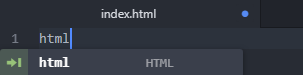
Coding tips: auto-insert code
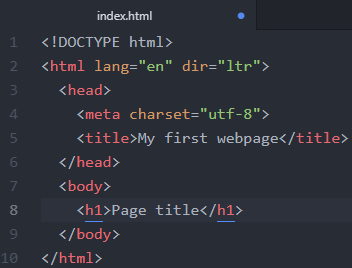
Create a new file (Ctrl+N) to practice. Press Ctrl + S to save it as an .html file. Next, type html and press Enter to insert basic html code:
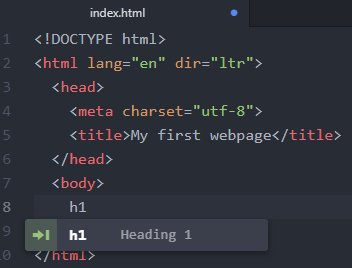
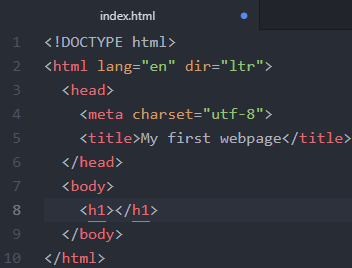
Now add a h1 title by typing h1 (inside the body) to add a Page title to the page:
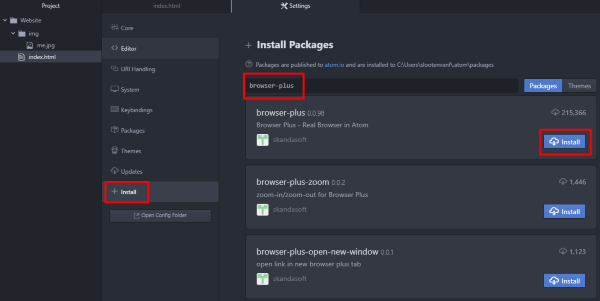
Atom tips: add packages
You can enhance Atom with packages. We will show you how to install the browser-plus package as an example.
- Choose File > Settings
- Click Install
- In the search field, type
browser-plus - Click Install (this can take a few minutes, you can continue to use Atom)
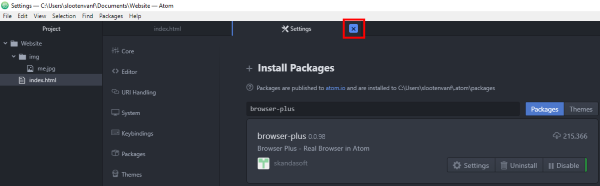
You can close Settings afterwards:
After succesfull install of the browser-plus package use ALT+CTRL+O to start it (or right-click > Open Browser-Plus).
Need help?
Check the FAQ page. If you keep getting problems, use the chat to ask a question or contact us for help via email.